Dryer Vent Installation In Wall

Classic Style Home Dryer Vent Install Into The Wall Laundry Room Remodel Laundry Room Makeover Laundry Room

Dryer Vents How To Hook Up And Install Dryer Vents Dryer Vent Laundry Room Basement Laundry

Installing A Dryerbox Well Groomed Home Laundry Room Storage Laundry Room Storage Shelves Laundry Room

From House To Home Home Repairs Dryer Vent Brick Repair

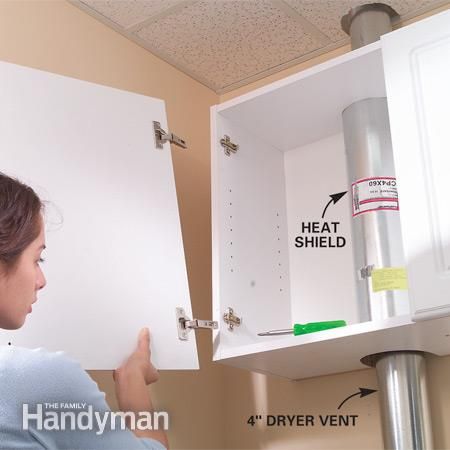
Model 350 Dryerbox 2x4 Wall Wall Home Improvement Dryer Vent

Pin On I Made This

First carefully pull the dryer away from the wall and disconnect the power cord.
Dryer vent installation in wall. Homeowners with extensive diy experience may be able to install on their own using one of these kits. Proper dryer vent installation is vital to prevent fire and water damage to your home. Keep in mind these rules of thumb. A correctly installed dryer vent keeps your home safe by removing mois.
Use a section of vent pipe to mark a circle where the opening will be from inside of your home. Pull the dryer away from the wall. Expect to pay 12 to 30 for an indoor kit that includes a transition duct clamps and an indoor vent lint trap. When installing a dryer vent for laundry centers in basement locations keep in mind that the vent hood on the exterior of your home must be at least 12 inches from the ground.
Depending on where you buy them standard kits range in price from 10 to 25 each and include a transition duct clamps wall sleeve and outside vent. Dryer vent installation in 6 steps step 1. Duct and subtract 5 ft. The shorter the distance and fewer the turns the better for dryer vent installation.
Average vent kit costs. For every 90 degree turn and 2 1 2 feet for every 45 degree turn for dryer vent installation. Secure the dryer vent cap on the home exterior. Install the dryer vent cap against the side of your house being sure that its attached pipe fits through the wall opening you have made.
Use no more than 25 ft.

Hook Up Your Dryer With A New Dryer Vent Box Great New Product Laundry Room Home Dryer Vent Box

Installing Dryer Vent In 2x4 Wall Dryer Vent Cleaning Clean Dryer Vent Dryer Vent Vent Cleaning

Dryerbox Collecting The Vent Hose Neatly In The Wall Eliminates Having To Leave Space Behind The Dryer Laundry Room Inspiration Laundry Room Dryer Vent Kits

Dryer Vents How To Hook Up And Install Dryer Vents Dryer Vent Dryer Vent Installation Dryer

A Recessed Box Installed Into The Wall That Allows You To Push Your Dryer Right Up To The Wall Otherwise You Have To Leave S Laundry Room Home Dryer Vent Box

Installing A Dryerbox Well Groomed Home Diy Laundry Room Makeover Laundry Room Diy Laundry Room Makeover

Installing A Dryerbox Well Groomed Home Laundry Room Diy Pantry Laundry Room Laundry Room Design

Installing A Dryerbox Well Groomed Home Laundry Room Laundry In Bathroom Laundry Closet

Clean Your Dryer Ducts To Guard Against Fire Vent Cleaning Clean Dryer Vent Dryer Repair

Recessed Dryer Box Installed Into The Wall That Allows You To Push Your Dryer Right Up To The Wall House Tweaking Small Laundry Rooms Laundry Room

Dryer Box Eliminates The Big Gap Between The Washer Dryer And The Wall Need This Laundry Room Storage Laundry Room Bathroom Laundry Room Design

Ziggurat Products Dryer Vent Dryer Vent Hose Laundry Room Layouts

Dryer Vents How To Hook Up And Install Dryer Vents Dryer Vent Installation Dryer Vent Plumbing Problems

How To Hook Up A Dryer Vent In A Tight Space Dryer Vent Dryer Vent Installation Clean Dryer Vent

Existing Construction Retro Fit Dryer Box For Hose So Dryer Can Go Right Up Against The Wall 30 Washer Dryer Set Dryer Hose Dryer Vent Installation

Builder S Best Dryer Outlet Box Youtube Laundry Room Bathroom Dryer Outlet Laundry Room Diy

404 Not Found Laundry Room Laundry In Bathroom Laundry Room Remodel

Magvent Dryer Vent Connectors Laundry Room Laundry In Bathroom Laundry Closet
Https Encrypted Tbn0 Gstatic Com Images Q Tbn 3aand9gcryk3tdjsj8kl6oxwccvd9rehjsqaxniv1kycum1aeuf9vqavb Usqp Cau

Connected Semi Rigid Dryer Hose Dryer Hose Dryer Vent Hose Dryer

Installing Semi Rigid Dryer Hose To Prevent Fire Hazard Dryer Hose Clean Dryer Vent Dryer Vent Hose

Snap To Vent The Best Dryer Connection For Installing Your Dryer Diy Dryer Installation Dryer Vent Dryer Hose Dryer Vent Laundry Room Best Dryer
How To Organize A Laundry Room With A Laundry Folding Table Laundry Room Storage Laundry Room Storage Shelves Small Laundry Room Organization

How To Upgrade A Dryer Vent Dryer Vent Dryer Vent Hose Laundry Room

Four Types Of Clothes Dryer Vents Hankeyandbrown Com Ashi Certified Inspectors In Eden Prairie Mn Laundry Room Dryer Vent Dryer Vent Installation

Dryer Vents How To Hook Up And Install Dryer Vents Dryer Vent Dryer Vent Installation Indoor Dryer Vent

Dryer Vent Solution So You Can Move Your Dryer Closer To The Wall Laundry Room Laundry In Bathroom Laundry Closet

This Dryer Vent Lets You Move The Dryer Within 3 Of Your Wall Space Can Be A Precious Commodity Especiall Dryer Vent Periscope Dryer Vent Laundry Room Remodel

The Quickest And Easiest Dryer Installation Snap To Vent Dryer Vent Connection With No Tools Necessary Gets R Dryer Vent Hose Dryer Vent Laundry Room Makeover

Nj Dryer Vent Cleaning Dryer Wall Vent Installation Dryer Vent Clean Dryer Vent Masonry Wall
Periscope Laundry Room Diy Dryer Vent Periscope Dryer Vent

New Thermal Basement Window With Dryer Vent Graphics Code New Thermal Basement Window With Dryer Vent Comments Picture Basement Windows Dryer Vent Basement

Dryer Venting System Now I Can Push The Washer And Dryer All The Way Back And I Won T Loose Clothing I Laundry Room Remodel Laundry Room Laundry Room Makeover

Pin By Lisa Porter On Odds And Ends Eave Vent Bathroom Exhaust Bathroom Vent

First Floor Laundry Drain Building A Home Forum Gardenweb Laundry Room Flooring Laundry Room Basement Laundry Room

Flex Dryer Vent Through Floor Only Solid Metal Should Penetrate Through Floors Walls Dryer Vent Flooring Solid Metal

Whirlpool 29 77 In In The Wall Dryer Vent Periscope Periscope Dryer Vent Dryer Vent Dryer Duct

Install The Proper Dryer Vent Hose To Minimize A Dryer Fire Laundry Room Remodel Laundry Room Diy Dryer Vent

Dryer Vents How To Hook Up And Install Dryer Vents Dryer Vent Dryer Duct Dryer Vent Installation

37 Life Hacks That Will Save You Thousands Clean Dryer Vent Dryer Vent Vent Cleaning

Photos Of Dryer Box Complete Library Of Dryer Venting Solutions Images Laundry Room Laundry In Bathroom Laundry Room Makeover

Give The Dryer Some Space Dryer Vent Dryer Vent Kits Dryer Vent Box

